2.25.2009

A Tendency to Embellish....

Oh my gosh, do I ever have a tendency to embellish- and now it's not just with stories- With clothes too! Take for example this simple black dress (oh, and meet my dress form, her name is Angela)- I bought this dress at Target off the clearance rack for $17.99....I mean, it's okay for a little black dress, but as one of my sisters would say, "it's BOOOORRRRING me!".....hopefully, if I've done my job here well, by the time you get done reading this, and see the finished product, you'll think it looks a LOT cuter!

So, I embellished the neckline to suit my own style!- Here's how I did it ...I found some old fabric that I had from a previous project and cut it in long strips, and sewed them together to make one very long strip- like 2.5 times the length around the neckline- then I gathered it to make a long ruffled piece (see the Missoni scarf post to see how I gather the fabric to make ruffles)- then I just pinned it on around the neckline and sewed it on! Throw a fun belt around your waist, and you've gone from BOOORRRING black dress, to a bit edgy, different, and definitely more fun!


This project is super easy, super inexpensive, and it adds a very original touch. Altogether, this project cost about $32.99: $17.99 for the dress, probably about $2 worth of leftover fabric, and the belt was $12.99 (from Target too!) You can do this with just about any piece of clothing....a really easy and fun project would be to find an old skirt (perhaps one you bought at Abercrombie & Fitch during freshman year, and now you're thinking to yourself, "how on earth did I ever think this was long enough to wear in public?")- Maybe you don't want to get rid of it, but it's definitely too short- so you add a thick ruffle to the bottom of it- adds length and jazzes it up!

2.18.2009

So expensive, designer goods....

....Um, actually, no, not expensive at all! Ok, so here's the deal, like I've said before, my fantastic parents gave me a sewing machine for Christmas last year, and I have been teaching myself how to sew ever since....now, I have to admit, some of the projects don't go over so well- and in fact I have spent up to 10 hours on something before, only to scrap it, as I have no idea what I'm doing- but some, on the other hand, turn out quite nicely. For example- this scarf! Wow, I love this scarf, and was very pleased with the outcome, and the cost of making it.

A key ingreditent to success in pulling off something that is designer (but not really) is finding a fabric store that sells actual designer's fabrics, and then you make a litttle something out of it on your own. I am obsessed with Missoni- don't know why, just love the family, love the fabrics, love it all! So when I found this authentic Missoni fabric at Muna Couture (best discovery ever! For those in Nashville, you must check it out- Muna has AMAZING stuff!) I knew I had to have it! The great thing is, Muna gets her fabric years before it hits runways and stores, so when she has stuff on sale because it's "last season," it really is like 4 years away from even showing up on Anna Wintour's desk. So here's what you do- buy up as much of it as you can, and make as many cool things out of it as you can (and give some away as presents, but be sure to keep some for yourself too).

I don't care who you are, if you have access to a sewing machine, you can make this scarf. Simply cut a long rectangle, fold it long-ways down the middle, so it's inside out, pin up the open side. Sew a stitch up the pinned side, and turn it right side out. Find some trim that matches your designer fabric, and cut it the to the proper length (as in, the distance from the rest of the scarf to the edge) and about twice as wide (which will be parallel to the short edge of the scarf). Take a needle and thread and weave it through the trim piece loosely, with about 1/2 in between each stitch- then pull the loose end to make the fabric gather. Do this with the trim for the other end as well. Then stuff the gathered end of the trim into the open end of the scarf, and pin it closed. Then just run it through the sewing machine. Do this for the other end, and you're done! I mean, you can say it's a Missoni scarf- technically it is- sorta. Close enough, right?

2.16.2009

It Ain't No Secret, Folks...

....Cedar plank-smoked salmon is fabulouso!!! Ok, I'm not gonna lie and say it's like this super easy thing to make for dinner; however, it is super delish, and definitely a crowd pleaser (oh, and it's very healthy!). So here's what you do- get yourself a cedar plank, such as Fire & Flavor brand, or any other at your fav grocery store- soak it in water for at least 2 hours- it must be completely submerged for the entire time. Also, pick up a lemon, slice it very thinly, and a bunch or fresh rosemary. And of course, the salmon!

Heat your grill on high heat for about 10 minutes. In the meantime, coat the top side of the cedar plank with some olive oil, sprinkle with salt and pepper. Place the cedar plank on the grill, and allow it to warm up in the grill for about 7 minutes. Then, place the lemons in a single layer, covering the plank, then place the rosemary sprigs on top (6 sprigs should be sufficient). Then, after seasoning the salmon with salt and pepper, place them on top of the lemon and rosemary-clad cedar plank. Close the grill lid and leave it closed for at least 12 minutes (opening it to check the fish frequently will only make it take longer to cook). After 12 minutes, check the fish- it will be flaky when it's finished- every piece of fish will be different in terms of size, and therefore the cooking time will be different too. Once the fish is cooked, remove it from the grill (have a bucket of cold water standing by for the cedar plank to be plunged into as it might be on fire at this point).


The cedar plank-smoked salmon is great to serve on top of Toasted Pine Nut Couscous (Near East brand)! And then, for the finishing touch, roast some jewel vegetables, such as zucchini, red onion, and grape tomatoes tossed in olive oil, balsamic, and salt and pepper on a cookie sheet in the oven at about 350 for 20 minutes. This dish looks beautiful, it's healthy, so delicious, and it costs about $14! Enjoy!

2.13.2009

Pizza ParTAY!


Ok, so one of mine and my husband's new favorite meals is homemade pizza.....now, making homemade pizza can be pretty scary as homemade crusts, and even some store bought pizza crusts can turn out to be mushy disasters; however, they're delish when you use Boboli or something similar. They make these crusts in "thin" now, which I love! So another fun spin on the homemade pizza is the pizza party- the grown up version of when you used to go to Noble Romans and were invited into the kitchen to make your own pie for your Birthday- we've substituted the plastic Noble Roman's crowns with wine- much more fun, by the way. Anyway, this is a great, easy way to entertain friends and get everyone involved in the creation. For this party I bought a few crusts, and assorted toppings (this gets really easy when you buy those pre-chopped peppers, onions, tomatoes, and whatever else you like). My new favorite topping is grilled Cajun chicken- I just seasoned a couple chicken breasts with Tony's Cajun seasoning (so good!) and threw them on the grill and chopped them up (this can be done earlier in the day, or even a day before). Really, all you need is the crust, some sauce, your fav topping, and cheese- oh, and friends and wine! I love this concept as I have found that when a group is over at a house for dinner, despite that fact that you have really comfortable chairs and couches about 10 feet away in the next room, people always gravitate toward the kitchen, even if it means they have to stand- so you might as well put them to work as pizza chefs! So much fun! Enjoy!

2.10.2009

Wine Glass, Candle Holder, Whatever...

Ok, so I saw this trick in Everyday with Rachel Ray and I just loved it and thought it was such a clever way to throw together a fun table setting....again, here I am with the theme of make it shine, but don't make it expensive. The Rachel Ray article spun it as a way to make use of mismatched stemware- and there were tons of different kinds of wine glasses in the picture, and I thought, "wait a sec, something's wrong here, I mean, I've broken my fair share of wine glasses in my day, but not enough to have like 10 different kinds of mismatched wine glasses laying around." So then I thought, "well, they don't have to be mismatched, couldn't they all be sort of the same, and at the very least, just whatever I have in my cabinets?" The answer is "Yes!" And here is the finished product. The great thing about this idea is that you only have to buy a few flowers to make this so gorgeous- rather than a full centerpiece worth of them.


So just find a couple different styles of wine glasses- whatever you have on hand, position some of them right-side-up and some upside-down, and throw a few large-faced flowers under some of the upside down wine glasses, and arrange pillar candles as you like inside the right-side-up ones, and on the bottoms of the upside-down ones! Voila! Easy as pie, and very striking! You can really use any type of flower or other plant in this type of centerpiece- for Christmas dinner my very creative mom opted for holly that was growing near-by and evergreen sprigs and we used those where you see the Gerbera daisies here.


For an added touch of color, I found these giant leaves at Nashville's Import Flowers (this place is amazing, by the way), and laid them in a fanned-out sort of arrangement to serve as the base of my centerpiece. These leaves would also be great as place mats at an outdoor shower or other party! Have fun with this one!

2.07.2009

Stitch-What-ery?

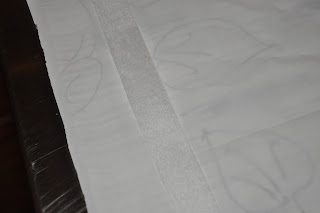
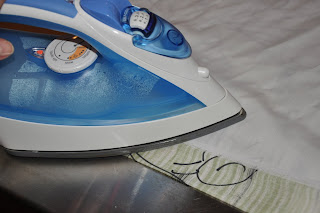
Stitch-Witchery! Man, gotta love this stuff.....ok, so even though we only finished decorating one of our bathrooms about a year ago, we're already saying to ourselves, "what on earth were we thinking with those colors?" So, it's time for a change- and what better way to make a dramatic change to a bathroom than with a new window treatment? I mean, with the invention of stitch-witchery, it couldn't be easier- no sewing machine needed.....all you have to do is find a piece of fabric you like (light weight fabrics will work best with the stitch-witchery), cut it to about 1 and a half times the width of your window, and to whatever length you wish (full window-length, or you can do a cafe curtain as we did here- this saves time and money, and lets the light in!)- leave about an inch extra on all sides for the hem, add lining if you want to (cheap muslin fabric works great!), and grab the iron! If you're hanging a window treatment for the first time in this particular room, you'll also need the curtain rod, rings, and drapery hooks. I know this sounds like a lot, but if you initially pick a versatile curtain rod, such as the black one here, you can change up the fabric every year at very little expense- this is so fun because you get to recreate the look of a room, and you can do it often, and inexpensively! Here's what you do:
  • Cut the fabric (and lining if you're using) to the desired size
  • Lay the fabric upside down on a counter or floor
  • If you're using lining, lay the lining directly on top of the upside down fabric
  • Place a strip of stitch-witchery along the edge between the fabric and lining

  • Press on top of the lining with the iron on its highest temperature- press hard for a for a good amount of time (about 10 seconds) in each spot to make sure the bond takes hold
  • Repeat on all four edges
  • Then you'll place a strip of stitch-witchery along the edge on top of the lining, about an inch inside the edge; and fold the side up so that the stitch-witchery is covered, and press with the iron

  • Repeat with the opposite edge
  • Then to finish the final two sides, lay a strip of stitch-witchery along the edge, just like in the last step
  • Before pressing, start with one corner by folding it in at at 45 degree angle so as to create a finished edge; press this corner
  • Then move to the other corner and make the 45 degree-angle fold, and press- continue pressing the entire length of that edge between the two corners
  • Repeat with the final edge
Ta-Da!!- new window treatment, sans sewing machine, and in about 20 minutes! It's important to know that stitch-witchery obviously isn't going to hold as well as if the hems were sewn, but it is super fast, super easy, and if you're like me, and sick of decorations really, fast, this will do just fine until you move on to your next window treatment!

2.04.2009

Basket Weaving With Cheese?


Well, ok, so it's not exactly weaving, but it is basket making with parmesan cheese! Let me tell you, if you want to impress some people for a nice dinner or fun occasion, this trick is great and it can be used in so many different ways! A good friend of mine who spent a semester in Italy in culinary school taught me this, and I've used it countless times since.....here's what you'll need
  • A non-stick skillet
  • Shredded parmesan cheese (tip: the longer the shreds, the better, and don't use Kirkland brand (from Costco) parmesan, it's the only kind I've tried that doesn't work; try Kraft or any other store-packaged shredded parm- should work great)
  • A very thin spatula or cake-icing utensil
  • A jar of spices or some other container you have around the kitchen

Here goes....

Heat the skillet to medium; sprinkle the parm shreds in a circle as big as you would like (it seems that 6-8 in diameter inches or so works well).

Once the parm is golden brown, loosen one side of the edges, slip the spatula or other utensil under the edge, and flip over. I find it helpful to slip the spatula under, and before flipping it, place a couple fingers on top of the parm to make sure it doesn't slip off the spatula- plus, using two hands will help guide the parm onto its other side in the middle of the skillet.

Finally, let that side brown for about 20 seconds or so....don't let it stay there long enough to start burning. Then, slip the parm onto the spatula again and place it over a spice jar or other container, depending on the shape you want it to take. Once you place it over the container, the sides of the parm will start to fall down to form an upside down basket. Leave the basket on the container for about 5 minutes at least, to let it harden.


Once it is hardened, use it in any way you like. I love to make risotto and present it in the parm basket- it's also great for Caesar salads. You can really make any shape you feel like and use it in so many different ways! Enjoy!


Oh, and another thing....

As you might notice, the title of this blog is Hault- which means lofty, or haughty- I really like this word, and especially for the type of blog I'm creating here- ideas about how to spice up life when it comes to your home, your food, your clothing, and your entertaining......I like to wear fun clothes, make delish meals, and entertain friends and family in style, but I don't like for it to cost a bazillion dollars....so basically what I'm trying to convey here are ideas to make it sweet, stylish and snappy, and oh yea, make it not cost a ton of money! Cheers!

2.03.2009

Getting it going....

Ok, so one of my magnificent friends recently started her own blog- it's pretty genius by the way- and she inspired me to start my own as well...so here I go. Here's the idea- "Not Your Martha's Blog" - ok, so stop, rewind, a bit of background is in order. So I try to be as creative as possible and have recently found myself delving into all sorts of artistic outlets- most of my obsessions with these outlets originated from the Bravo network and all of its glorious reality TV shows. For example, upon watching Project Runway for the first time, I exclaimed, "I wanna be a fashion designer." So the very next Christmas my lovely parents gave me a sewing machine, and off I went. I also find great joy in cooking, decorating, and trying to get my friends to let me help plan their weddings.....now, there's a hitch.....I'm not really a fashion designer, nor am I a top chef, a savvy interior designer, or a wedding coordinator, I'm just a person who finds herself constantly thinking of fun stuff to get into and create. On more than one occasion when unveiling a recent creation, a friend has said to me, "oh, you're soooo Martha!" To which I always reply, at least in my head, "ugh, can't I just be Leigh Ann?" So, this blog is for all of you out there who like to create, whatever the creation may be, whether you do it to make a living, or just to make living more fun.