9.23.2009

Not to get all "baby stuff" on you, but.....


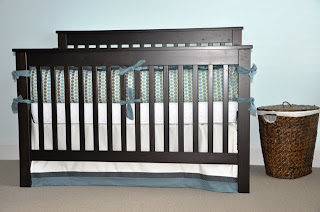
Well, since I have a bun in the oven, everything around our house has sorta of gone baby on us...I mean, there is an actual crib in our house- WHAO! So exciting! So of course I had to get all hyped up about making the baby's bedding.....at first I thought, "ugh, this is going to be much too much of a hassle, I should just buy something." Well so then I started looking around on websites, and instantly became obsessed with Serena & Lily - their 3 piece crib bedding sets are adorable! Great fabrics, so cute, etc., etc. Well, the not so cute thing about them is the price- like seriously, $580 for crib bedding? You've got to be kidding me! So that wasn't gonna happen.....and since I have this lovely fabric store here in Nashville, Textile, which carries THE CUTEST fabrics, I knew that if I could figure out how to make the stuff, I'd have something just as adorable as Serena & Lily for at least 1/2 the price. TA DAAAA! This stuff was way easier to make than I anticipated- don't get me wrong, it's a big project, and you have to be ready to spend some time on it, but I am so happy that I went for it, and I know all of you over-zealous, (and especially first-time), expectant gals out there can do it too! I'm not going to get in the nitty-gritty step-by-step on this stuff, but I want to generally share how I made all of this.....so take a look at the pics below....
You'll need 8 pieces of fabric to make the body of your bumpers- 2 pieces for each bumper. You'll also need any piping and other trim that you want to use to embellish the style of the bumpers. Finally, you'll need something that will serve as the ties that will attach to the crib itself. Here I made my own ties to match the fabric I bought, but you can also use any ribbon you like. For each bumper, I put one tie on each of the four corners, and then 2 set of ties on the top and bottom of the long bumper as well. This way you'll use the corner ties from adjacent bumpers to tie onto the crib posts.
Once you have all of your pieces ready to go, you need to assemble the bumpers from the inside out. So lay one of your pieces of fabric down, right-side-up, then start to place all of the other pieces where they need to go. Any piping or trim you're using will lay with the rough edges lined up with the top of the pieces of main fabric. Same goes for the tie pieces- they will all be placed so that the ends of the ties that will go around the crib bars will be in the middle of the body piece of fabric and the rough ends will be placed right on the edges of all four corners (and in the case of your long bumpers that run the longest length of the crib, you'll need a set of 2 ties on top and bottom to tie around the middle bars of the crib). Once you have all of the pieces situated like so, lay the other piece of body fabric right-side-down on top of everything else, then pin together. Then you're ready to sew it up. Sew all around all four sides, leaving only about a 6-8 inch opening on the bottom edge of each bumper so that you can stuff them. Once you have it sewn up leaving the stuffing hole, turn the bumpers right-side-out. Then stuff!
Finally, sew up the 6-8 inch stuffing hole by folding the edges inward and pinning in place. Tip- if you've chosen to use any piping or trim, use a zipper foot to sew around those sides, which makes the machine work easier. Good luck!

9.16.2009

Baby Shower Favors

I recently co-hosted a baby shower for one of my friends, and straight off I volunteered for favor-making duties- I just love this kind of stuff, so I snatched up that responsibility right away. I wanted to make something that the gals would take home and actually use...now, I'm a big bath person, so this sounded especially great to me. I just rounded up the following materials and put together little bath salt favors with a cute baby theme!

  • Unscented bath salts as well as scented bath salts (pick your fav scent, and check Marshalls or TJ Maxx for really great deals on giant jugs of this stuff- I mixed the two together as the scented ones were a bit overwhelming, so I toned them down with the unscented)
  • Glass apothecary jars of various shapes and sizes from Hobby Lobby or Michaels
  • Ribbon of your choice (here I used blue in honor of the soon-to-be-born baby boy)
  • Plain round white stickers (found these at Office Depot, seriously think they're meant to be yard sale price tags!)
  • Stamps of your choice
  • Ink pad in color of your choice

So I just mixed the bath salts together to make a lovely smelling mixture, then I filled each of the glass jars with the salts. I finished off the cute favors by gluing a piece of ribbon around the jar (hot glue gun works best), placing a white sticker where the ribbon ends came together, and then stamping the sticker with something cute and fun. That's it! This is an easy way to make super cute favors- perfect for baby showers, wedding showers, birthdays, or any special occasion where you'd like the ladies to leave with something lovely! Have fun!

Chicken Tortilla Soup: Yumm-O!!

Ok, I have made some version of this soup many times before, just tossing in this and that spice here and there in various measurements, but this time it turned out so delish, I had to share! Try it out for a nice fall soup as the nights start to cool off a bit!

Ingredients:
  • 3 Tbsp olive oil
  • 2 boneless, skinless chicken breasts, diced
  • 1/2 of a jalepeno, finely chopped
  • 1/2 of a yellow onion, diced
  • 1 Tbsp Cumin powder
  • 2 cloves garlic, crushed
  • 1 Tbsp salt, plus more for seasoning to taste
  • 1/4 Tsp Cheyenne pepper
  • 1 Tsp Chili powder
  • 1 15 oz. can chicken broth
  • 4 Tbsp flour
  • 3 cups milk
  • 1 baking potato, peeled and diced
  • 2 ears corn, shucked, and kernels cut off the cob
  • 1/2 cup shredded mexican cheese mix, plus more for garnish
  • Tortilla strips for garnish
  • Diced tomato for garnish

What to do:

Place the oil, chicken, jalepeno, garlic, onion, and all spices in a large soup pot; cook the ingredients until chicken has turned white and cooked almost all the way through. Stir in about a 1/4 cup of the chicken broth; then stir in the flour to form a paste; stir in the rest of the chicken broth and then the milk; stir very well and bring to a boil, stirring constantly; then reduce heat to low. Stir in the potato and corn; simmer for about 10 minutes, then stir in the cheese. Cover and leave to simmer on very low heat for about 20 minutes, or until the potatoes are soft and easily break with the poke of a fork. Stir frequently as to not allow the soup to burn on the bottom. Taste before serving- if it's too bland, add salt until it tastes delicious. Serve with tortilla strips, diced tomato, and shredded cheese on top. Enjoy!

9.05.2009

Dork Alert!

Ok, I know that it is completely not normal for a 28 year old gal to get this excited about something so mundane, but check this out, I just found the most amazing way to get furniture indentations out of carpet! Yep, that's right, that's actually what I'm sitting here typing this post about at 9:13 on a Saturday morning- furniture indentations!
So we're shuffling rooms in our house all around to make way for the baby- selling furniture, moving furniture, etc., etc.....needless to say, we have LOTS of furniture indentations left in the wake of all of this moving, and they drive me NUTS! So I was reading online about how to get rid of these pests, and the method that looked easiest to me was the one I tried first- putting an ice cube on the indentation and then let it melt and then fluff it up- NOPE, don't even bother, totally doesn't work. I figured heat needed to be involved somehow, so I thought about trying out the 'ol clothes steamer we got for our wedding- OH MY GOSH, I can't even tell you how delighted I am with the results- it's like brand new carpet. Our steamer has a flat attachment to use on garments, so I took that off so that the little spout would pour out more concentrated amounts of steam rather than spreading it out. Worked like a charm- you just hold the steamer over the indentation and I could literally see the fibers rising before my eyes! Unbelievable- super fast, super easy, and if you don't have a steamer, seriously come borrow ours- it'll be worth the trip!

9.04.2009

Heidi, Tim, are you Paying Attention?

Ok, so this post has absolutely nothing to do with the purpose of this blog, so I'm sure I'm breaking the number one rule of blogging by putting it up here, but I can't help it. I'm just so proud and secretly hoping to get discovered- I couldn't resist showing you all this dress!

My friend Cami got married a couple weeks ago and a while back we were talking about dress making and what not, and she said, "oh my gosh, why don't you make me a dress for me to wear out after our wedding?" Well of course I was just so flattered that anyone would want to wear one of my creations, so I jumped at the opportunity. We went fabric shopping immediately and we were so thrilled with what we found (this Prada fabric) that Cami insisted that this be her rehearsal dinner dress instead! So we talked through the design together, and this is what came out of it. I say that it has nothing to do with the purpose of this blog because it wasn't inexpensive or easy to make, but again, I'm just too proud to keep it to myself! Hopefully the producers of Project Runway are crawling the Internet and find this post!
I learned so much making this dress- I have no formal training in sewing, and I mean, this thing is fully lined, has interfacing, and boning! I had no idea how to do any of that before I made this dress so I'm so excited to have the experience under my belt now! (Big thanks to Muna, who helped out extraordinarily!!) My favorite part of the dress is the bustle I put into the back (in this picture, it looks a bit messy, but in real life it's so cute!) Whew, think it turned out pretty great! Oh, and I made the little matching bow tie for her husband, Wes, too- how cute is that? Hope you all like it! And congrats to the happy couple!!!

8.05.2009

Froof-er-ize Your Life

First off, I must apologize for neglecting my creative duties for so long....I'm sure I've lost most of my followers as a result, and I don't blame you- hopefully you'll all come back to me and I'll keep adding new posts!

Ok, now down to business.....so, I made this dress recently and am just OBSESSED with the one-shouldered froof I attached to give it some glam! As I was making it, I was thinking to myself, "wait a sec, I could add one of these cool froof things to any old washed up boring strapless dress and make it like new again." For instance, I have this old JCrew strapless black dress- it's cute, but boring, and old, so it needs something fresh to bring it back to life, and a froof like the one seen here would do just the trick! Making the froof is easy, and easy to work onto any strapless dress.

What you'll need to do is buy a big piece of fabric (preferably something sort of stiff and crunchy like the froof I made here, so that the ruffles will stand up on their own); fold it diagonally to make a triangle. The triangle, from tip to tip, needs to be at least twice as long as the distance from under one armpit, over the top of your other shoulder, and back around your back, ending at the same armpit. Then cut along the fold, cutting sort of a semi-circle shape so that the ends, which will attached under your one arm, are skinnier than the middle, which will sit on top of your other shoulder. Then sew up the open side, and then turn inside out. Then grab a needle and thread and loosely make stitches along the seem, so that once you get thread through the length of the seem, you'll pull it gently, bunching the fabric to make ruffles. Once you make the ruffles, make sure the froof is the right length to go from under one arm, up over your shoulder, around your back, and back to the first armpit. Then this next part is where your creative license comes in- just grab a needle and thread and start bunching the fabric together in random spots and making a stitch here and there and tying it off. This will make you one nice, long froof.

Then you simply attach the froof, beginning under the first armpit, securing it to your dress, also tack it on a few places on the front of the dress, only about right to between your cleeve, and then leave enough loose fabric that it will comfortably go up over your shoulder, and then start attaching again at about the middle of the back of the dress, and then a few more stitches, ending again under the first armpit.

This is a super simple and cheap way to completely reinvent an old strapless dress- the one shouldered stuff is really in these days, and this simple froof addition really adds MAJOR GLAM to an otherwise boring old dress! Good luck!

6.09.2009

Baby Gifts!


Ok, so I have at least 3 baby gifts to give in the upcoming months (slash one is really past due- sorry Amanda!) and I wanted to make something super cute and practical for these friends....I have seen darling hooded baby towels online before, made by companies such as Dwell- they're all so cute, and well, so ridic expensive- honestly, what baby needs a $60 towel? So I thought I'd give it a go on my own. I am super happy with the outcome, and it seriously only took about an hour total to make- going to start mass-producing....here's how I did it:

First, pick out a fun cotton fabric and some terry cloth for the lining. Cut two rectangles with the fabric layered on top of the terry cloth so you have matching sized pieces. One rectangle will be the hood part, so it will be much smaller than the other rectangle, which will be the body of the towel. For the hood piece, layer the fabric and terry cloth with the correct sides together on the inside, and pin up 3 of the sides. Then you'll sew up all 3 sides, and then turn right-side-out. Repeat with bigger rectangle. Once you have the 3 sides all sewn up, tuck the edges of the 4th side of the hood piece inward, to make a clean closure, and pin up and sew together that final side. Don't close up the bigger rectangle yet.

Then, take your sewn-together hood piece and fold it in half inside out. Make a stitch along one of the sides coming off the fold to make the hood shape. Then take the remaining long side of the hood piece and tuck it into the 4th side of the bigger towel piece- tuck in the edges of the towel piece around the hood piece, and pin together- then sew up. And you're all finished! Now you have a designed-esq baby towel that didn't cost an arm and a leg!

5.21.2009

Overly Domesticated

Ok, I almost hate to admit it, but yes, I just made a chicken pot pie from scratch (and yes, I can hear the derogatory 1950's "how to be a good housewife" quotes streaming through my head now), but I'm really proud of this one, and wanted to share. My hubby loves chicken pot pies, so to be nice, one day I just threw together what I thought would be in one, and I just went for it. It turned out pretty well, so I have made them a couple times since. Now the reason for this post is that I found myself without a key ingredient, and so I had to improvise. It might be jumping the gun a bit to brag about this solution already, since the pie has yet to be consumed, but I'm confident it will turn out great!

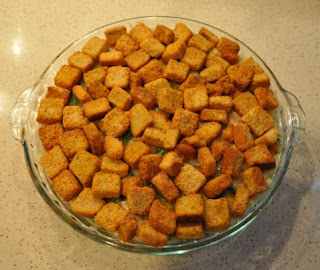
So I was missing a pie crust- an obvious essential of chicken pot PIE; and rather than being SEVERELY overly domesticated and making a pie crust from scratch, I scrapped the bottom layer crust (don't need the extra carbs anyway) and replaced the top crust with croutons! They're garlic cheddar flavor too, so I'm thinking they'll add a little pizazz to the dish.

So here's what you'll need to make the whole thing, start to finish:

  • 2 boneless, skinless chicken breasts, diced
  • 1 cup chopped onion
  • 4 cloves minced garlic
  • 1 1/4 cup chicken broth
  • 2 tbs flour
  • 2 tbs fresh chopped rosemary and thyme
  • 1 cup frozen mixed veggies (carrots, green beans, corn- all come in the bag together)
  • 1 tsp salt
  • 1 bag croutons
Heat a medium skillet over medium heat, add chicken, onion and garlic with about 1/4 cup of the chicken broth; saute until the chicken is cooked through; whisk in the flour to form a paste, then add the rest of the chicken broth, the herbs, the veggies, and then salt. Simmer for about 10 minutes until the mixture has thickened up (add a bit more broth if it gets too thick- it should be about the consistency of your favorite hearty chili).

Pour the mix into a pie dish, then sprinkle the croutons on top to form a crust. Cover and let sit for at least 2 hours- this will give the croutons a chance to soak up the moisture from the mix. Then bake, covered, at 375 for about 25 minutes- take off the foil for the last 5 minutes to give the croutons a chance to get crusty again. You can make this ahead and refrigerate after putting the croutons on- this will add to your cook time though, as the dish will be colder to begin with. Bottom line, just keep an eye on it- it should bubble up through the croutons a bit, letting you know it's nice and hot!

5.20.2009

Parchment Meals


Ok, this is a trick I learned eating out at restaurants and reading cookbooks. Parchment paper meals are super easy and delish, and make for next-to-nothing clean up. You can cook pretty much anything this way, and the pouch you make out of the parchment paper allows the food inside to steam up very nicely- with all ingredients blending as they cook.

One idea is a type of Greek meal (seen above from Everyday Food Magazine)- lay out a large piece of parchment paper on the counter, and toss on a chicken breast, some artichoke hearts (chopped), some red onion, kalamata olives, and tomatoes- top it off with a drizzle of olive oil, salt and pepper and feta cheese, fold up the sides, and crimp them together so the pouch remains closed. Set the pouch in a baking dish with sides (so that if any of the juices run out, they'll be caught and not dirty up the oven), place in the oven- preheated to about 375, and let cook for about 25 minutes. Depending on your oven, it may take longer, but feel free to check it after about 20 minutes to see how the chicken is doing- you be the judge on time. Once the chicken is finished, just empty the pouch onto your plate and eat up!

Seriously, you can cook any meal you dream up this way; some other ideas are:
  • Tuna steak with chopped jalapeno, soy sauce, chopped fresh ginger, garlic and snow peas;

  • Any kind of white fish with julienne veggies (onions, carrots, celery)- maybe some rosemary and thyme sprinkled on top

  • Mexican flare- chicken breast with sliced bell peppers and onions, chopped jalapeno, and sprinkle generously with garlic salt, chili powder, and cumin powder- top off with cilantro and sour cream when it's finished
Enjoy!

4.21.2009

No Pots, No Pans, No Clean Up!

Spring is here!!! At least it's here in Nashville, and this is my favorite time of year in general, and definitely the best time to cook outside! Using your grill to make the entire meal is a fun, and different way to cook, and it saves you LOADS of clean-up time and dish washing detergent! All you need is tin foil, your chosen meats, veggies, and even fruits for desert (think grilled peaches)! After you're finished eating, all you have to do is toss the used foil!

Last night we made delicious steaks, as well as this yummy side dish of grilled mushrooms and onions. I just made a pouch out of foil by crossing two pieces of foil, perpendicular to one another, and then piled on the cleaned, stemmed, and quartered mushrooms first, then the sliced onions, then a few pads of butter, and topped off with salt and pepper. Close up the foil and add one more piece to secure the packet if needed. With the grill on medium-high, place the packet with the butter and onion side down- this will allow the flavor of the onions to steam up through the mushrooms, giving them great flavor. Leave the packet on the grill for about 15 minutes, flipping once, half way through. After the shrooms are cooked, just dump them onto a plate, toss the foil, and enjoy! Of course you can do this with any sort of veggies- bell peppers, squash, zucchini- just about anything your heart desires will be fantastic!

Also consider some less traditional grill-able items, such as tomatoes cut in half- cover them in a bit of olive oil, and season with salt and pepper- place the tomato on the grill for about 5 minutes, flipping once half way through. This will leave pretty grill marks, and a nice smokey flavor. Once the tomato is off the grill (or even better, during the last minute while it's still on the grill) top it with a slice of fresh mozzarella! YUM! Serve the tomato alongside your chicken or steak, and mushrooms! Delightful!

4.13.2009

Alter Your Clothes

Basic A-Line to Flirty Bubble!
So right now might not be the time to go out and spend tons of money on new clothes, eh? Well how about reinvent your current wardrobe instead? Here's a really simple (and free) way to make a new garment out of an old one! I took this basic A-line skirt and transformed it into a flirty bubble skirt just by adding a few safety pins......take a basic skirt and lay it out on the floor so that the bottom of the skirt is spread evenly in a circle. Grab about 10-12 safety pins and pull the bottom hem of the skirt, and pin it up into the inside, creating a bubbly hem with each pin. Do this so that the pins are spread out evenly with roughly the same amount of space in between each. And you're done! This skirt is so cute, and it makes what might have been an old boring skirt into a flirty, and teensie bit flashy, skirt you can wear out on the weekend, feeling fabulous!

4.07.2009

Bake and Bedazzle!


Ok, so I'm not much of a baker, I mean, seriously, you don't even want to know what the pumpernickel rolls I tried to make for Christmas turned out like- it was NOT pretty! But I love to bedazzle stuff, and anyone can throw together a boxed cake mix, jazz it up a little with a few extra ingredients to make it extra tasty, and then BEDAZZLE it to make it extra special! This was for my friend Kristie's birthday. I have seen this "present" motif on cakes done before, so I thought I'd give it a try. All you need to make a very cute, fun, special "present" cake for someone is:
  • Boxed cake mix (I used Pillsbury, extra moist- it has pudding in it to make it super moist!)
  • Any icing; I love Paula Deen's cream cheese icing (click here for the recipe)
  • 2 Tbsp lemon juice (you can use other flavored extracts too, such as coconut, or orange- if you use an extract, just use about a teaspoon though)
  • Raspberry cake filling, or any other flavor of filling
  • Decorative elements- for this cake I found colorful chocolate-covered sunflower seeds at Marshalls- I know it sounds random, but Marshalls always has really fun, unexpected candies that can be used for projects like this)
  • A ribbon

So you just prepare the cake according to the instructions, adding the lemon juice into the final batter. Make sure to spray the inside of the pan, and then sprinkle with flour all around, and shake out the excess- this will ensure that after the cake is baked, it will come out of the pan easily. After it is baked, let it sit for at least 15 minutes to cool. Once it is cooled off, take whatever you're going to present the cake on (platter or cake stand), and turn it upside down on top of the cake pan, hold the presenting platter tightly to the cake pan, and flip so that the cake comes out in the middle of your platter. Take a serrated knife and carefully cut horizontally across the middle of the cake (if you're really crafty, you can make 2 cuts to give you a three-layer cake). Remove the top layer to a paper towel near by, careful not to break the layer. Then spread some of the raspberry filling on the bottom layer, leaving about 1/4 inch around the edges. Then replace the top layer. To ice the cake, take a nice icing spatula and spread the icing on all sides and the top. If you're getting little cake crumbles coming off the cake as you do this, just leave a thin layer, pop it in the fridge for about 30 minutes, and then finish it up. Putting it in the fridge for a bit will help chill the icing and seal those crumbs in their place so that when you come back to finish the icing, the rest will go on really smoothly.

For the decorative elements, I literally threw the sunflower seeds at the side of this cake in order to make them stick into the icing on all sides (ugh, gravity), which worked really well. Instead of using some sort of candy, you can also just use other colors of icing and make a pattern of some sort. Finally, for the bow....for this cake I just crafted a small bow for the top (these are easy to make if you have a glue gun!). In order to get the ribbon on the cake, I just laid a piece in one direction, centered it on the cake, and then used my icing spatula to gently shove the very ends of each side under the iced cake. Then I repeated going the other direction to make the cross. Finally, I put a dab of glue gun glue on the ribbon where the pieces intersected, and the placed the pre-made bow on top- voila!

This is a great crafty, foody project that anyone can do, and it's such a fun thing to have at a birthday party. Give it a whirl!

3.31.2009

Not Tryin' to Brag...


....well, ok, maybe I am, just a little...but I wanted to share with you all my newest creation! I found this fabric at Textile, which is a great fabric store here in Nashville- they had apparently just unloaded the "glorious designer fabric" truck, and there it was staring me in the eye, the most beauteous Carolina Herrera fabric my eyes had ever seen! So of course I just had to have it- I told my Mom about it, and she was nice enough to make it one of by birthday presents (how nice is that!!???). I promised I'd do her proud, so hopefully I did.....I just made a simple shift dress, which is basically just a rectangle sewed together, with sleeves.
Ok, yes, when I wore this in Vegas, some guy did ask me, "hey, is that a space suit?" But I didn't let it sting me- this fabric is way too cool, and clearly that guy didn't know anything about how glorious Carolina Herrera is!

3.22.2009

Don't Fret!

So sorry that I have been neglecting my creative duties- have been on vacay with our glorious friends Cara and Lee, as well as with the soon-to-be Mr. and Mrs. Mantravadi. Cara and Lee live in Salt Lake City, which is such a cool and beautiful place- they were nice enough to put us up for 5 days and take us all around town! Thanks, guys, we had a blast!!! Then it was to Vegas, which is where I am currently stranded, cursing the Southwest Airlines powers-that-be who provided us with the simple explanation- "oops, we oversold your flight, you've been involuntarily bumped" - lovely, thanks so much for that...as if I had nothing to do back at home!! Sorry, so annoyed...anywho, I promise to get back to blogging about food, fashion, and other fun stuff just as soon as I return to real life! Check back soon!

3.09.2009

Fraud Alert!!

Ok, so I blatantly stole this super cute idea from my friend Jane, who is a complete craft genius! This is such an easy and fun project and such a thoughtful way to put your own spin on a baby gift- personalize away! All you need for this project is the following:
  • Some baby onsies;
  • Fabric with which to make your appliques;
  • Double-sided iron-on adhesive

Iron on the adhesive to the wrong side of the fabric you'll use, cut into desired shape, and then iron on to the onsies. Taking a cue from Jane, I also stitched these in a couple places, if not all the way around, so that they'll hold up in the washer. Tie them up in a cute little bow, and you have yourself a perfect baby gift! Have fun!


2.25.2009

A Tendency to Embellish....

Oh my gosh, do I ever have a tendency to embellish- and now it's not just with stories- With clothes too! Take for example this simple black dress (oh, and meet my dress form, her name is Angela)- I bought this dress at Target off the clearance rack for $17.99....I mean, it's okay for a little black dress, but as one of my sisters would say, "it's BOOOORRRRING me!".....hopefully, if I've done my job here well, by the time you get done reading this, and see the finished product, you'll think it looks a LOT cuter!

So, I embellished the neckline to suit my own style!- Here's how I did it ...I found some old fabric that I had from a previous project and cut it in long strips, and sewed them together to make one very long strip- like 2.5 times the length around the neckline- then I gathered it to make a long ruffled piece (see the Missoni scarf post to see how I gather the fabric to make ruffles)- then I just pinned it on around the neckline and sewed it on! Throw a fun belt around your waist, and you've gone from BOOORRRING black dress, to a bit edgy, different, and definitely more fun!


This project is super easy, super inexpensive, and it adds a very original touch. Altogether, this project cost about $32.99: $17.99 for the dress, probably about $2 worth of leftover fabric, and the belt was $12.99 (from Target too!) You can do this with just about any piece of clothing....a really easy and fun project would be to find an old skirt (perhaps one you bought at Abercrombie & Fitch during freshman year, and now you're thinking to yourself, "how on earth did I ever think this was long enough to wear in public?")- Maybe you don't want to get rid of it, but it's definitely too short- so you add a thick ruffle to the bottom of it- adds length and jazzes it up!

2.18.2009

So expensive, designer goods....

....Um, actually, no, not expensive at all! Ok, so here's the deal, like I've said before, my fantastic parents gave me a sewing machine for Christmas last year, and I have been teaching myself how to sew ever since....now, I have to admit, some of the projects don't go over so well- and in fact I have spent up to 10 hours on something before, only to scrap it, as I have no idea what I'm doing- but some, on the other hand, turn out quite nicely. For example- this scarf! Wow, I love this scarf, and was very pleased with the outcome, and the cost of making it.

A key ingreditent to success in pulling off something that is designer (but not really) is finding a fabric store that sells actual designer's fabrics, and then you make a litttle something out of it on your own. I am obsessed with Missoni- don't know why, just love the family, love the fabrics, love it all! So when I found this authentic Missoni fabric at Muna Couture (best discovery ever! For those in Nashville, you must check it out- Muna has AMAZING stuff!) I knew I had to have it! The great thing is, Muna gets her fabric years before it hits runways and stores, so when she has stuff on sale because it's "last season," it really is like 4 years away from even showing up on Anna Wintour's desk. So here's what you do- buy up as much of it as you can, and make as many cool things out of it as you can (and give some away as presents, but be sure to keep some for yourself too).

I don't care who you are, if you have access to a sewing machine, you can make this scarf. Simply cut a long rectangle, fold it long-ways down the middle, so it's inside out, pin up the open side. Sew a stitch up the pinned side, and turn it right side out. Find some trim that matches your designer fabric, and cut it the to the proper length (as in, the distance from the rest of the scarf to the edge) and about twice as wide (which will be parallel to the short edge of the scarf). Take a needle and thread and weave it through the trim piece loosely, with about 1/2 in between each stitch- then pull the loose end to make the fabric gather. Do this with the trim for the other end as well. Then stuff the gathered end of the trim into the open end of the scarf, and pin it closed. Then just run it through the sewing machine. Do this for the other end, and you're done! I mean, you can say it's a Missoni scarf- technically it is- sorta. Close enough, right?

2.16.2009

It Ain't No Secret, Folks...

....Cedar plank-smoked salmon is fabulouso!!! Ok, I'm not gonna lie and say it's like this super easy thing to make for dinner; however, it is super delish, and definitely a crowd pleaser (oh, and it's very healthy!). So here's what you do- get yourself a cedar plank, such as Fire & Flavor brand, or any other at your fav grocery store- soak it in water for at least 2 hours- it must be completely submerged for the entire time. Also, pick up a lemon, slice it very thinly, and a bunch or fresh rosemary. And of course, the salmon!

Heat your grill on high heat for about 10 minutes. In the meantime, coat the top side of the cedar plank with some olive oil, sprinkle with salt and pepper. Place the cedar plank on the grill, and allow it to warm up in the grill for about 7 minutes. Then, place the lemons in a single layer, covering the plank, then place the rosemary sprigs on top (6 sprigs should be sufficient). Then, after seasoning the salmon with salt and pepper, place them on top of the lemon and rosemary-clad cedar plank. Close the grill lid and leave it closed for at least 12 minutes (opening it to check the fish frequently will only make it take longer to cook). After 12 minutes, check the fish- it will be flaky when it's finished- every piece of fish will be different in terms of size, and therefore the cooking time will be different too. Once the fish is cooked, remove it from the grill (have a bucket of cold water standing by for the cedar plank to be plunged into as it might be on fire at this point).


The cedar plank-smoked salmon is great to serve on top of Toasted Pine Nut Couscous (Near East brand)! And then, for the finishing touch, roast some jewel vegetables, such as zucchini, red onion, and grape tomatoes tossed in olive oil, balsamic, and salt and pepper on a cookie sheet in the oven at about 350 for 20 minutes. This dish looks beautiful, it's healthy, so delicious, and it costs about $14! Enjoy!

2.13.2009

Pizza ParTAY!


Ok, so one of mine and my husband's new favorite meals is homemade pizza.....now, making homemade pizza can be pretty scary as homemade crusts, and even some store bought pizza crusts can turn out to be mushy disasters; however, they're delish when you use Boboli or something similar. They make these crusts in "thin" now, which I love! So another fun spin on the homemade pizza is the pizza party- the grown up version of when you used to go to Noble Romans and were invited into the kitchen to make your own pie for your Birthday- we've substituted the plastic Noble Roman's crowns with wine- much more fun, by the way. Anyway, this is a great, easy way to entertain friends and get everyone involved in the creation. For this party I bought a few crusts, and assorted toppings (this gets really easy when you buy those pre-chopped peppers, onions, tomatoes, and whatever else you like). My new favorite topping is grilled Cajun chicken- I just seasoned a couple chicken breasts with Tony's Cajun seasoning (so good!) and threw them on the grill and chopped them up (this can be done earlier in the day, or even a day before). Really, all you need is the crust, some sauce, your fav topping, and cheese- oh, and friends and wine! I love this concept as I have found that when a group is over at a house for dinner, despite that fact that you have really comfortable chairs and couches about 10 feet away in the next room, people always gravitate toward the kitchen, even if it means they have to stand- so you might as well put them to work as pizza chefs! So much fun! Enjoy!

2.10.2009

Wine Glass, Candle Holder, Whatever...

Ok, so I saw this trick in Everyday with Rachel Ray and I just loved it and thought it was such a clever way to throw together a fun table setting....again, here I am with the theme of make it shine, but don't make it expensive. The Rachel Ray article spun it as a way to make use of mismatched stemware- and there were tons of different kinds of wine glasses in the picture, and I thought, "wait a sec, something's wrong here, I mean, I've broken my fair share of wine glasses in my day, but not enough to have like 10 different kinds of mismatched wine glasses laying around." So then I thought, "well, they don't have to be mismatched, couldn't they all be sort of the same, and at the very least, just whatever I have in my cabinets?" The answer is "Yes!" And here is the finished product. The great thing about this idea is that you only have to buy a few flowers to make this so gorgeous- rather than a full centerpiece worth of them.


So just find a couple different styles of wine glasses- whatever you have on hand, position some of them right-side-up and some upside-down, and throw a few large-faced flowers under some of the upside down wine glasses, and arrange pillar candles as you like inside the right-side-up ones, and on the bottoms of the upside-down ones! Voila! Easy as pie, and very striking! You can really use any type of flower or other plant in this type of centerpiece- for Christmas dinner my very creative mom opted for holly that was growing near-by and evergreen sprigs and we used those where you see the Gerbera daisies here.


For an added touch of color, I found these giant leaves at Nashville's Import Flowers (this place is amazing, by the way), and laid them in a fanned-out sort of arrangement to serve as the base of my centerpiece. These leaves would also be great as place mats at an outdoor shower or other party! Have fun with this one!

2.07.2009

Stitch-What-ery?

Stitch-Witchery! Man, gotta love this stuff.....ok, so even though we only finished decorating one of our bathrooms about a year ago, we're already saying to ourselves, "what on earth were we thinking with those colors?" So, it's time for a change- and what better way to make a dramatic change to a bathroom than with a new window treatment? I mean, with the invention of stitch-witchery, it couldn't be easier- no sewing machine needed.....all you have to do is find a piece of fabric you like (light weight fabrics will work best with the stitch-witchery), cut it to about 1 and a half times the width of your window, and to whatever length you wish (full window-length, or you can do a cafe curtain as we did here- this saves time and money, and lets the light in!)- leave about an inch extra on all sides for the hem, add lining if you want to (cheap muslin fabric works great!), and grab the iron! If you're hanging a window treatment for the first time in this particular room, you'll also need the curtain rod, rings, and drapery hooks. I know this sounds like a lot, but if you initially pick a versatile curtain rod, such as the black one here, you can change up the fabric every year at very little expense- this is so fun because you get to recreate the look of a room, and you can do it often, and inexpensively! Here's what you do:
  • Cut the fabric (and lining if you're using) to the desired size
  • Lay the fabric upside down on a counter or floor
  • If you're using lining, lay the lining directly on top of the upside down fabric
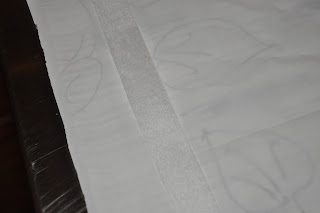
  • Place a strip of stitch-witchery along the edge between the fabric and lining

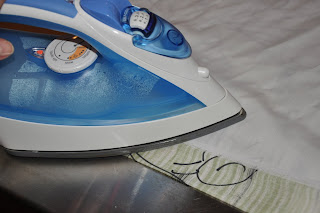
  • Press on top of the lining with the iron on its highest temperature- press hard for a for a good amount of time (about 10 seconds) in each spot to make sure the bond takes hold
  • Repeat on all four edges
  • Then you'll place a strip of stitch-witchery along the edge on top of the lining, about an inch inside the edge; and fold the side up so that the stitch-witchery is covered, and press with the iron

  • Repeat with the opposite edge
  • Then to finish the final two sides, lay a strip of stitch-witchery along the edge, just like in the last step
  • Before pressing, start with one corner by folding it in at at 45 degree angle so as to create a finished edge; press this corner
  • Then move to the other corner and make the 45 degree-angle fold, and press- continue pressing the entire length of that edge between the two corners
  • Repeat with the final edge
Ta-Da!!- new window treatment, sans sewing machine, and in about 20 minutes! It's important to know that stitch-witchery obviously isn't going to hold as well as if the hems were sewn, but it is super fast, super easy, and if you're like me, and sick of decorations really, fast, this will do just fine until you move on to your next window treatment!

2.04.2009

Basket Weaving With Cheese?


Well, ok, so it's not exactly weaving, but it is basket making with parmesan cheese! Let me tell you, if you want to impress some people for a nice dinner or fun occasion, this trick is great and it can be used in so many different ways! A good friend of mine who spent a semester in Italy in culinary school taught me this, and I've used it countless times since.....here's what you'll need
  • A non-stick skillet
  • Shredded parmesan cheese (tip: the longer the shreds, the better, and don't use Kirkland brand (from Costco) parmesan, it's the only kind I've tried that doesn't work; try Kraft or any other store-packaged shredded parm- should work great)
  • A very thin spatula or cake-icing utensil
  • A jar of spices or some other container you have around the kitchen

Here goes....

Heat the skillet to medium; sprinkle the parm shreds in a circle as big as you would like (it seems that 6-8 in diameter inches or so works well).

Once the parm is golden brown, loosen one side of the edges, slip the spatula or other utensil under the edge, and flip over. I find it helpful to slip the spatula under, and before flipping it, place a couple fingers on top of the parm to make sure it doesn't slip off the spatula- plus, using two hands will help guide the parm onto its other side in the middle of the skillet.

Finally, let that side brown for about 20 seconds or so....don't let it stay there long enough to start burning. Then, slip the parm onto the spatula again and place it over a spice jar or other container, depending on the shape you want it to take. Once you place it over the container, the sides of the parm will start to fall down to form an upside down basket. Leave the basket on the container for about 5 minutes at least, to let it harden.


Once it is hardened, use it in any way you like. I love to make risotto and present it in the parm basket- it's also great for Caesar salads. You can really make any shape you feel like and use it in so many different ways! Enjoy!


Oh, and another thing....

As you might notice, the title of this blog is Hault- which means lofty, or haughty- I really like this word, and especially for the type of blog I'm creating here- ideas about how to spice up life when it comes to your home, your food, your clothing, and your entertaining......I like to wear fun clothes, make delish meals, and entertain friends and family in style, but I don't like for it to cost a bazillion dollars....so basically what I'm trying to convey here are ideas to make it sweet, stylish and snappy, and oh yea, make it not cost a ton of money! Cheers!

2.03.2009

Getting it going....

Ok, so one of my magnificent friends recently started her own blog- it's pretty genius by the way- and she inspired me to start my own as well...so here I go. Here's the idea- "Not Your Martha's Blog" - ok, so stop, rewind, a bit of background is in order. So I try to be as creative as possible and have recently found myself delving into all sorts of artistic outlets- most of my obsessions with these outlets originated from the Bravo network and all of its glorious reality TV shows. For example, upon watching Project Runway for the first time, I exclaimed, "I wanna be a fashion designer." So the very next Christmas my lovely parents gave me a sewing machine, and off I went. I also find great joy in cooking, decorating, and trying to get my friends to let me help plan their weddings.....now, there's a hitch.....I'm not really a fashion designer, nor am I a top chef, a savvy interior designer, or a wedding coordinator, I'm just a person who finds herself constantly thinking of fun stuff to get into and create. On more than one occasion when unveiling a recent creation, a friend has said to me, "oh, you're soooo Martha!" To which I always reply, at least in my head, "ugh, can't I just be Leigh Ann?" So, this blog is for all of you out there who like to create, whatever the creation may be, whether you do it to make a living, or just to make living more fun.